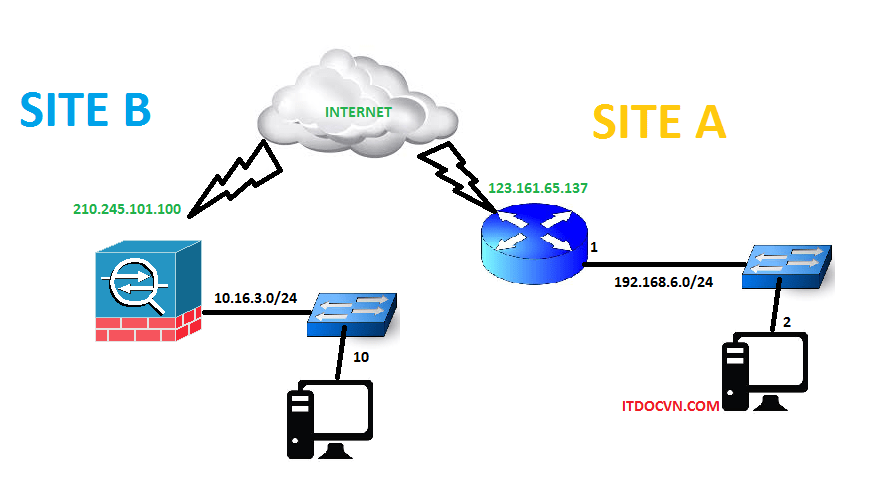
Cấu Hình VPN Site to site: Router Cisco 2811 – ASA 5510
SITE A – ROUTER CISCO 2811:
Bước 0: Quoay PPPoE Trên router cisco
Bước 1: Tạo Internet Key Exchange (IKE) key policy:
Router(config)#crypto isakmp policy 10
Router(config-isakmp)#encryption 3des
Router(config-isakmp)#authentication pre-share
Router(config-isakmp)#group 2
Bước 2: Tạo shared key để sử dụng cho kết nối VPN
Router(config)#crypto isakmp key Cisco123 address 210.245.101.100 (IP của ASA site B)
Bước3: Quy định lifetime
Router(config)#crypto ipsec security-association lifetime seconds 86400
Bước4: Cấu hình ACL dãy IP có thể VPN
– Lưu ý: đối với trường hợp Vừa quoay PPPoE vừa chạy VPN site to site thì trong phần NAT overload làm như sau:
Router(config)#ip nat inside source route-map nonat interface Dialer0 overload
Router(config)#route-map nonat petmit 10
Router(config-route-map)#match ip address 100
Router(config)#access-list 100 deny ip 192.168.6.0 0.0.0.255 10.16.3.0 0.0.0.255
Router(config)#access-list 100 permit ip 192.168.6.0 0.0.0.255 any
Router(config)#access-list 101 permit ip 192.168.6.0 0.0.0.255 10.16.3.0 0.0.0.255
=> Thì mạng bên trong mới vừa vào internet được và vừa VPN được.
Bước 5: Định nghĩa transformations set cái mà sẽ được sử dụng cho VPN connection nầy:
Router(config)#crypto ipsec transform-set SET-VPN esp-3des esp-sha-hmac
Bước 6: Tạo cypto-map cho các transform, setname
Router(config)#crypto map MAP-VPN 1 ipsec-isakmp
Router(config-crypto-map)#set peer 210.245.101.100 (IP của ASA site B)
Router(config-crypto-map)# set transform-set SET-VPN ( Setname ở bước 5)
Router(config-crypto-map)#match address 101 (101 : acl-number ở bước 4 )
Bước7: Gán vào interface
Router(config)#interface dialer 0
Router(config-if)#crypto map MAP-VPN
SITE A – ASA 5510:
Bước 1: tạo Connection Profiles:
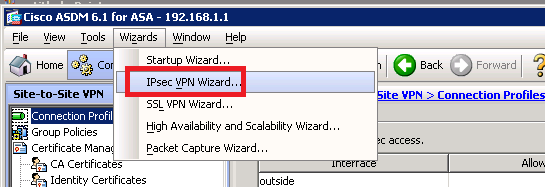
– Login vào ASDM và chọn Menu Startup Wizards… rồi sau đó chọn IPsec VPN Wizard…
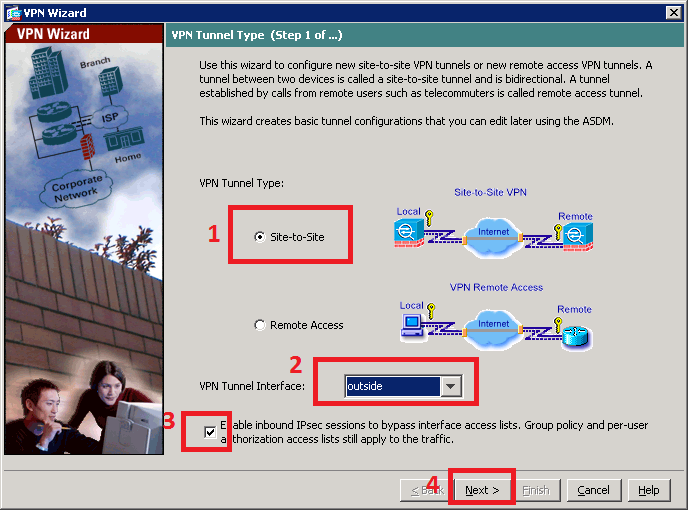
– Tại bước 1 chọn:
+ Tick vào Site-to-Site
+ VPN Tunnel Interface chọn interface: outside (WAN IP)
+ Và tick chọn Enable…. và bấm Next
+ Peer IP Address điền IP WAN của router 2811 (Site A).
+ Pre-shared key: gõ Cisco123 (giống như Pre-shared key ở router cisco 2811 site A) và nhấn Next.
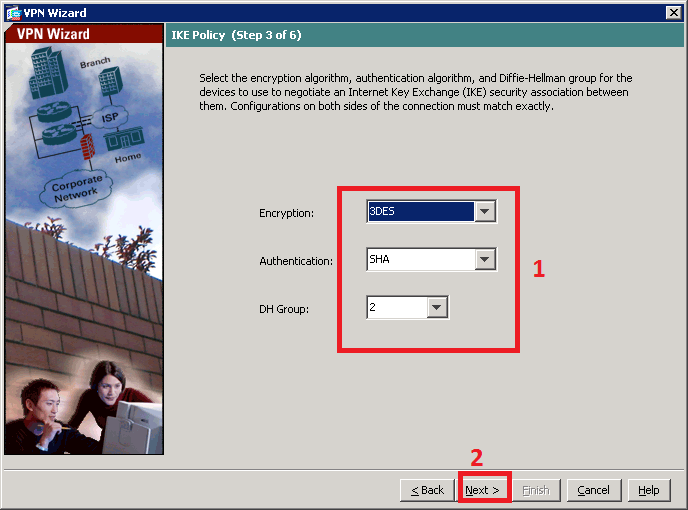
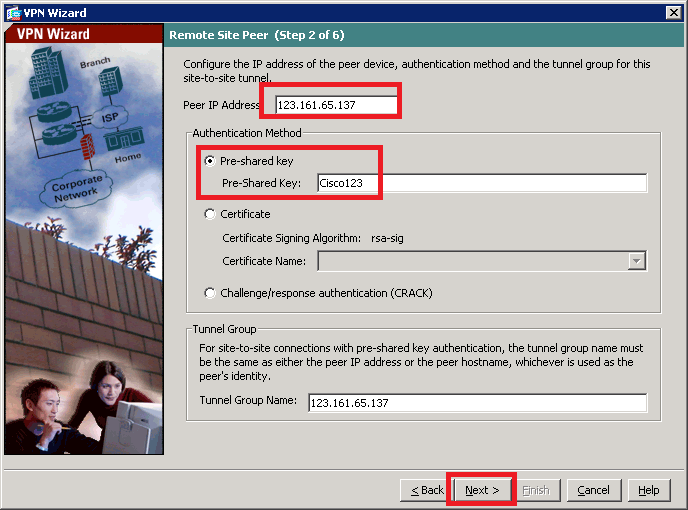 – Ở bước 2: chọn IKE Policy mã hóa và Authentication, lưu ý phải cùng loại với Router Cisco 2811. Ở đây ta để mặc định do ở bước 1 site A ta chọn 3des authen và Pre-shared key là : pre-share
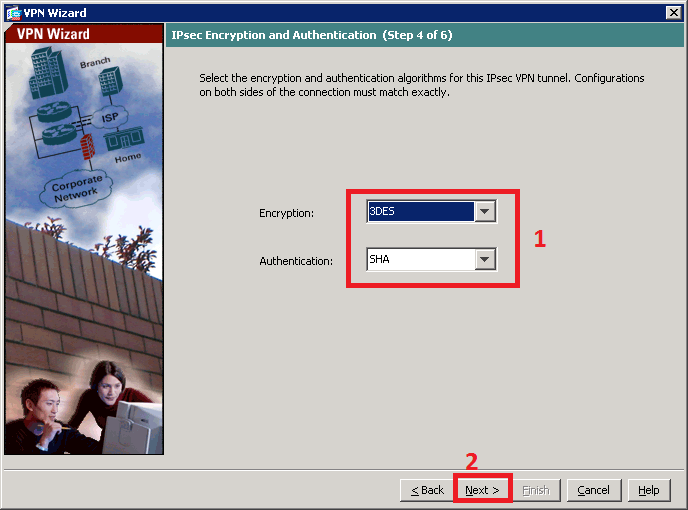
 – Ở bước 3 chọn thuật toán mã hóa và authen cho Tunnel lưu ý phải phù hợp với Cisco 2811 site A. Ở đây ta chọn 3DES và SHA do ở bước 5 site A ta chọn esp-3des esp-sha-hmac
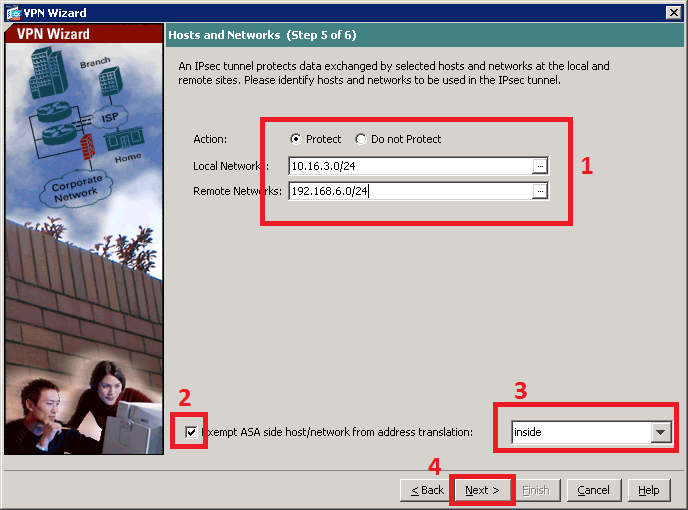
 – Tại bước 5: tương ứng với bước 4 Ở site A set ACL có thể VPN :
+ Local gõ 10.16.3.0/24
+ Remote 192.168.6.0/24
+ Và chọn interface translation là inside. Sau đó chọn Next
– Và bấm Finish để hoàn tất việc tạo kết nối(Connection Profile).
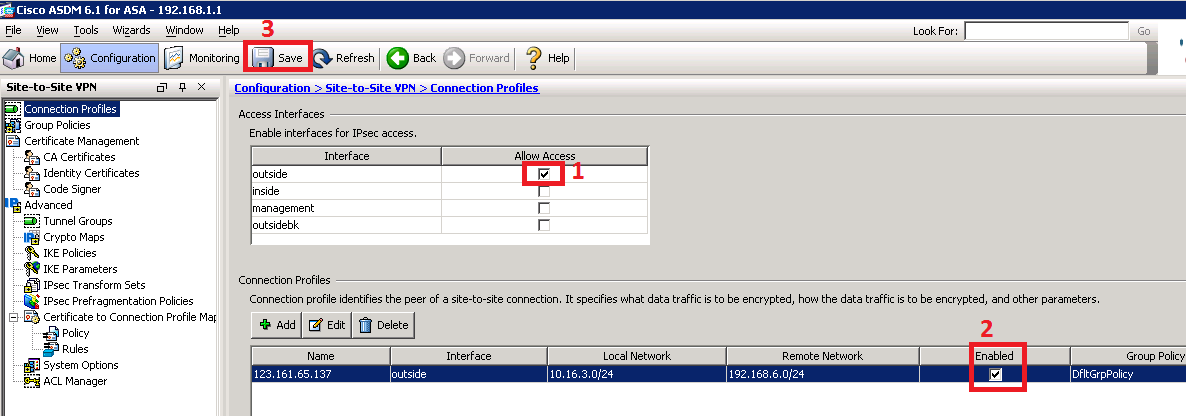
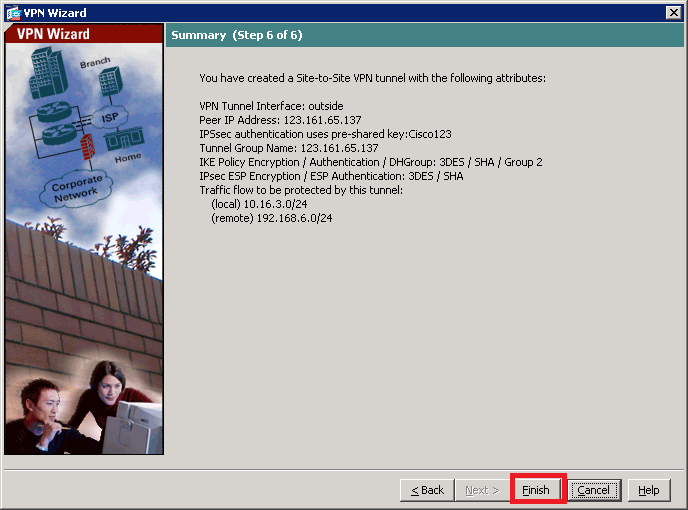 – Sau khi tạo kết nối xong tiế hành Enable interface for IPsec access.
+ Tại Access Interface click vào interface outside và click và check box Allow access tương ứng và nhấn Save
Bước 2: Tạo Access List:
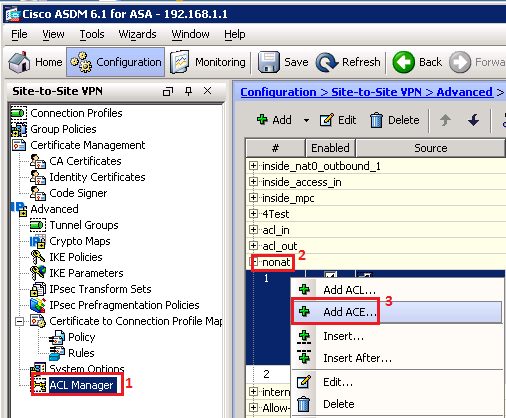
– Sau khi tạo Connection Profile xong ta tiến hành set access-list nonat cho kết nối VPN. Lưu ý mặc định nonat sẽ disable, bạn cần phải enable nó lên trước sau đó mới có thể tiến hành tạo access-list cho nonat.
+ Xổ dấu cộng tại Certificate to Connection Profile… và chọn ACL Manager. tại nonat click chuột phải chọn Add ACE…
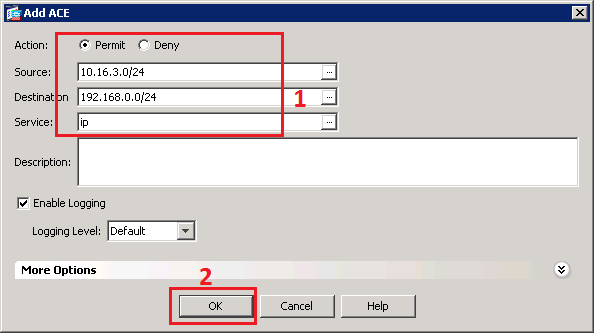
 – Permit cho class mạng 192.168.0.0/24 và 16.3.0/24 .
 – Sau khi tạo xong ta sẽ được như bên dưới.
– Tương tự như vậy ta kiểm tra đã permit cho outside và inside chưa( mặc định outside_cryptomap được tự động tạo khi khởi tạo Connection Profile).
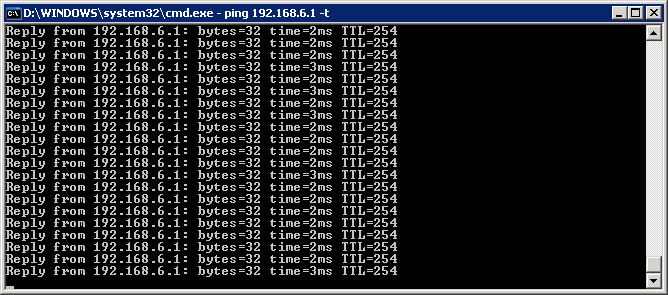
Kết quả: 2 site ping thấy nhau:
Tác giả: NGUYỄN VĂN TÀI – ITFORVN.COM
Bạn có thể tương tác và cập nhật thông tin mới nhất của Nhóm Facebook ITFORVN, Các khóa học mới do group tổ chức tại «Portal»

